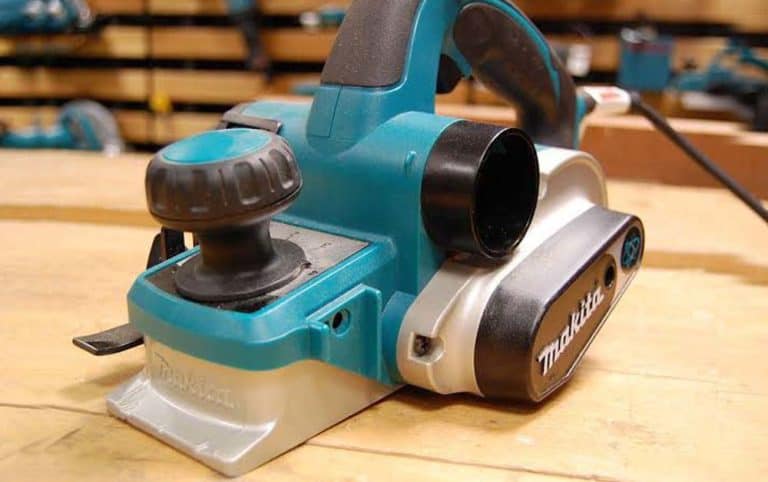
Have you any intention of becoming a skilled woodworker? A hand planer will be a good one for you whether you want to create an item of new furniture or repair anything. It is an essential tool for your workshop. An (Electric) hand planer is also a fundamental tool for any professional woodworker or hobbyist.
We have known about the Humble Hand Planer which is the most traditional tool for a woodpecker for a long time. To simplify the woodworking task and for better performance, electric versions of these conditional tools have just been launched. However, unlike traditional aerodynamics, electrical versions are powered by a motor which makes them highly efficient.
What is An electric (hand) planer
It is a tool used to take off a little amount of wood by shaving it off in increments. It typically possesses two or three blades to achieve the maximum amount of material that can remove in a single pass is usually around 1/8" (3/32" typically).
An electrical hand planer is undoubtedly a unique tool. Though it is unknown and not in the spotlight as much as some other tools out there.
They do have a specific purpose and can come in handy for certain things and in certain circumstances.
How to use an electric hand planer
At first, you have to balance your figure. To ensure it, stand with your feet apart. Make sure about the position where you stand is comfortable with you and makes it convenient for you to operate the planer through the workpiece.
The final effect showed on your workpiece solely depends on the speed with which you can push the planer and the cutting depth you choose for the tool.
Make sure of making the necessary arrangement before making a pass. These settings depend on your expected result and the type of wood you are working on.
For instance, if you wish to hog off dimensional lumber, then adjust your depth to ⅛ inches that would be reliable. For better and smarter finishing on hardwood, set it up to 1/64 or 1/32 inches that can give the expected result.
Before starting your work, assure that the blades are sharp enough. Most of the hand planers are equipped with re-sharpenable blades, which can be re-sharpened using a whetstone.
Most planers are equipped with a kickstand to save the blade. Ensure that it is well lifted and placed before making a single pass.
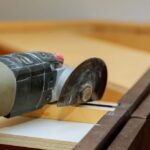
When you make the necessary arrangements, you can proceed and have a pass on your workpiece. This planer generally operates on a sole plate or a shoe. Initiate by placing the electric hand planer’s front shoe flat on the wood surface.
While doing this, affirm that the blades do not come into direct contact with the wood because they may damage the wood by causing unnecessary cuts.
In the next stage, switch on the motor and keep it in running mode until the highest speed is attained. When you gain the full rate, move the planer slowly until it comes into contact with the wood and pushes it forward gently.
Most electric hand planers are prepared with a handle that makes it easeful to achieve a firm grip.
Besides, when you push the tool into the workpiece, keep the initial pressure on the front grip. Bring the tool's handle and adjusted knob together with the workpiece. Maintain the balance of the hand as well as the pressure applied.
Sniping entails making a rough cut on the wood. To avoid it, don’t put a lot of pressure at the end of a pass. In this step, you have to push the planer over the workpiece to make a single pass.
How to Use An electric (hand) Planer on Wide Boards
At first, set up the board correctly. You can do this by getting a flat surface more extensive than the board, ensuring that it is fully supported.
When you cup the board, set it in a convex mode. Be sure that all the four edges of the board are marked. It will help you ensure leveling from one end to another.
Fix the board according to the marks you made. To place your board to a flat surface as you need, use winding sticks. It is suggestible that you flatten the full board in steps as it may change shape and lose tension.
Settle the board and leave it for a day or two to allow it to shape entirely.
Sanding down is the last step. You can use a wide-belt sanding machine to acquire an excellent finishing for the workpiece.
How to Use Electric Planer on a Tabletop
- Ensure that the wood you are using is dry and check it thoroughly for any nails.
- Clamped the table well to prevent it from moving around when working on it, making sure there is enough space for you to work.
- Apply pressure on the front panel and the heel of the planer before starting planing the wood. While starting planing, check with a straight edge on regular interval.
- Set the planer at the table’s edge and start planing off your workpiece in small amounts. Continue planing the table until you have gained your expected finish. You can adjust your blades to organize unique patterns.
- Once you have done planing, switch off the planer and keep it safely being confirmed that the blades are not running.
- Finally, you can varnish, wax or paint your table-top.
Safety Tips While Using an Electric Hand Planer
When you are using an electric hand planer, you must follow some safety rules to keep yourself safe from any significant or minor calamity. Safety guides are as following to prevent trouble:
- Put on safety gloves or glasses to protect your eyes from flying shavings
- Since some woods contain dangerous chemicals, put on a good quality dust mask to avoid inhaling the chemical during operation
- Ensure that you have disconnected the tool from power before changing the blades.
- Tighten the blade-locking screws perfectly
- Support the materials you are working on in a steady and comfortable position
- Always use two hands while running a planer.
- Do not put the planer down when the blades are still running.
- Ensure that the working area is smooth; there are no bumps when operating to ensure smooth planing from end to end.
Outcome
Electric hand planers save time as we can use them to cut on wooden surfaces, and can utilize them for a wide variety of purposes. They can hog off a large amount of wood within a short duration and ensure a smooth finishing on your workpiece.
With the guidelines and safety measures that I have highlighted above, you can easefully plane your wood piece without the presence of professional assistance.
It is a locally available tool that is cost-effective and has its guaranteed durability. If you purchase one for yourself, you won’t be disheartened as its performance is unique.