Hardwood floors are strong enough, but years of rough using, shuffling footsteps, scratches, and stains lose appearance and get damaged! If your hardwood floor is slightly scratched or damaged, you can definitely refinish it without sanding.
There is no need to spend a heap of cash by purchasing different sanders. Only you have to make sure to collect a floor buffer as well as a few necessary tools that are not much more expensive at all. By using these kinds of stuff, you can restore the beauty of your floor for sure!
So now, we are going to teach you how to sand a hardwood floor in a simple way. Even it is one of the cheapest yet effective way of sanding. Your next DIY project is going to be interesting, right?
What is Hardwood Floors?
Nowadays, the hardwood floor is one of the most popular choices out there because of its versatility of function. And the primary reason for choosing the hardwood floor is its sleek design, yes. The premium appearance of the hardwood floor will make you go awestruck!
Instead of selecting the softwood floor, it will be better to pick out the hardwood floor, whereas it is more long-lasting and needs less maintenance at the same time!
In the marketplace, there are three different types of hardwood floors; these are:
- Engineered
- Solid
- Acrylic impregnated.
Why Should You Need to Sand a Hardwood Floor?
As we have mentioned earlier, the hardwood floor that you are using may lose its outlook as well as may get damaged by scratching and rough use. Henceforth, it seems to be dull and useless!
So, the best solution to get rid of these negative things is to sand the hardwood floor that you are using for years. After all, everyone wants a scratch and stain free room, right?
Be careful when sanding.
If you have to sand the entire floor, be very careful. It is effortless to sand unevenly; it causes obstacles and divots, which you will not notice until you apply the finish when it is all clear.
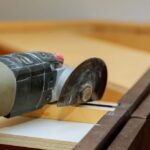
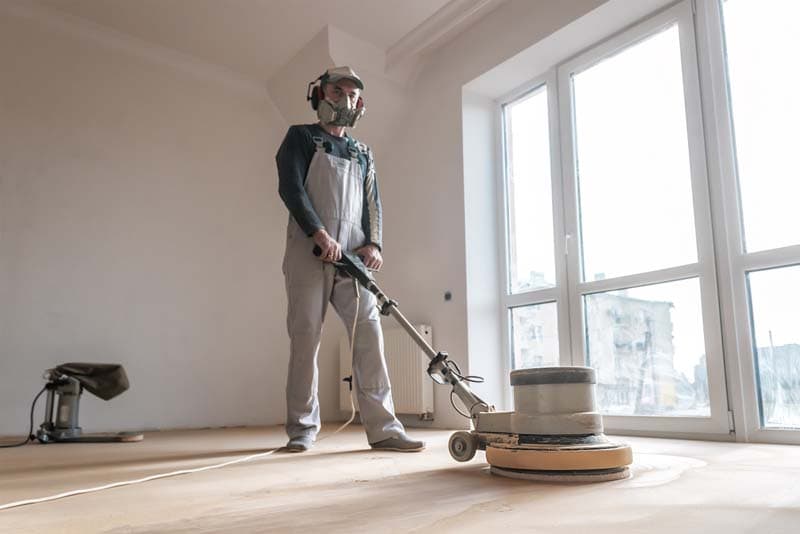
Use the right tools for the job; Ordinary handheld sanders are not extremely good. Instead, you will need drum-sanders or buffers.
These are heavy and complex, and if you have never used them before, it can belong to a bit of a habit. Again, if you are not careful and the structures are easy to build, and for most DIYers, it is better to defend this task to an expert.
How to Sand a Hardwood Floor step-by-step
After extended use, the wood floor becomes unhealthy due to dust, dirt, and fungus, so it needs to be cleaned later. We are presenting it step by step for you.
So let's move...
Recommended Tools
Sending a Hardwood Floor will require a good quality wood sender to complete the sanding task successfully. However, It can be electric sender, or hand sender also has together some necessary ingredients these are:
Tools:
- Floor cleaner
- wood sender
- Sandpaper (180-grit)
- Floor buffer
- Vacuum
- Rags or cloths
- Polyurethane

Safety equipment:
- Safety goggles
- Dust musk
- Hearing protection
- Boot

What are the Steps to Sand?
After discussing a lot of things, it is time to cut to the chase and straightly move on to the proper action! Hence, we are going to show you the step-by-step guide of how to sand a hardwood floor, stay tuned!
Step-1: Clean the Floor with a Hardwood Floor Cleaner
The first duty is to remove all the furniture from the room. Then, make sure to spray on the entire floor with a hardwood flooring cleaner. As an alternative way, you can make the cleaner by mixing up around 1 cup of vinegar with some water.
After spraying, you have to wipe the floor by a mop. Or else, you can use a rag by wrapping it around the mop head.
Then, you need to shut off the door and window for keeping the debris contained in the place.

Step-2: Prep the Perimeter
Use 180-grit sandpaper, make sure to hand-sand the perimeter of the entire room, especially the corners where a buffer cannot even reach.
Rub the baseboard by using the grain and it should be 4 to 6 inches out from the board. Continue the work until you see powder forms.
Note: For refinishing hardwood, we suggest not to use a sanding block, whereas it can miss the uneven spots!
Step-3: Scuff-Sand on the Floor Finishing
Now, wear a dust mask, and begin the project by sticking a maroon buffing pad. After that, you need to follow the direction of the grain. You have to move with the buffer from the side by side over the floor. You can overlap each course by 5 to 6 inches.
See, the old finish turns into powder! You have to keep going with the buffer continuously. However, it is better to take a break every 5-6 minutes or so!
Step-4: Vacuum and Track
For letting the powder settle with the floor properly, you have to leave the place around 10-20 minutes. After waiting for a couple of minutes, you have to take a vacuum to put a clean filter in it.
By using a felt-bottomed attachment, you need to sweep the entire place. Make sure to mix up the powder with the floors thoroughly. It will be better to use a microfiber cloth to dry up the room.
Step-5: Cut in along the Edges
Now, cover up your feet with boot and wear musk to get rid of poison gas.
Take a regular paintbrush and start the coating. For this, the best solution is to use the Polyurethane, as it is able to provide a clearance as well as a protective layer on the top of the floor. Moreover, it is resistant to stains, scratching damages, and liquids. Accomplish the coating task very carefully!
Warning: Polyurethane is a toxic substance. For this reason, we have suggested you wear safety equipment (which is listed above). Also, you should apply it to the well-ventilated areas to ensure a sufficient amount of safety.
Step-6: Roll Out the Polly
After coating with the brush, you have to roll out the entire room. For instance, use a long-handled roller that is attached by a 1/4 inch cap cover. Roll out the entire space, each and every corner as well. Let it dry up by itself. Wait for approximately 10-12 minutes.

After waiting for a couple of minutes, start the rolling again and, you have to ensure that you’re reaching properly in every corner. Continue the task until the whole room is covered! You should reach out Various types of varnishes.
Note: Before re-coating, make sure to wait for at least 2-3 hours. Let the room free for 7 days (minimum). After waiting for several days, you can set back the pieces of furniture.
Pro tips for sending
- It will be better to apply felt pads to table legs and furniture, which can minimize the chance of scratching.
- For completing this work successfully, you need to take enough time in your hand. It will be best if you wait for at least 24 hours/1day after sanding. Don’t touch it before 24 hours, even if you feel that it fully dries up. After all, outstanding things come to those who wait!
Conclusion
We are completely done! This was our short guide on how to sand a hardwood floor. We have tried to provide all the necessary pieces of information to you regarding the hardwood flooring.
From now, you can sand the floor with ease by yourself. If you’ve still any kind of confusion regarding the topic, then we suggest you give a second read to let the whole concept clear.
Meta: Sanding a hardwood floor can be tough, but if you know How to Sand a Hardwood Floor most efficiently, it won’t be much of a problem. That’s what we’re discussing.